Chimney Leaks: Causes, Fixes, and When to Call a Pro
Chimneys are the most leak-prone part of a typical roof. Here's how to figure out where the water is actually coming from — and what to do about it.
Of all the leaks we get called out for in New Jersey, chimney leaks are the most common — and the most misunderstood. Homeowners often think the problem is “the roof,” when really, the roof is fine. The water is coming in through the chimney.
Here’s how to figure out what’s actually going on, and how we typically fix it.
Why chimneys leak more than the rest of the roof
A chimney is essentially a vertical hole punched through your perfectly good roof. Water has to flow around it on every side, and there are at least four different places where the seal can fail. Add in the fact that bricks themselves are slightly porous and that mortar deteriorates faster than most people realize, and you have a structure that’s almost designed to leak.
There are five main culprits. We see all of them, and figuring out which one is causing your leak is half the battle.
1. Failed flashing
Flashing is the metal (usually aluminum or copper) that wraps around the base of the chimney where it meets the roof. It tucks under the shingles on one side and into the brickwork on the other, forming a watertight seal.
When flashing fails, it’s usually because:
- The original installer didn’t tuck it properly into the brick
- The caulk or sealant has dried out and cracked
- The metal itself has rusted through
- Someone re-roofed the house and reused the old flashing instead of replacing it
Fix: New step flashing and counter-flashing, properly embedded into the masonry. If the chimney was leaking for a while, the surrounding decking may also need to be replaced.
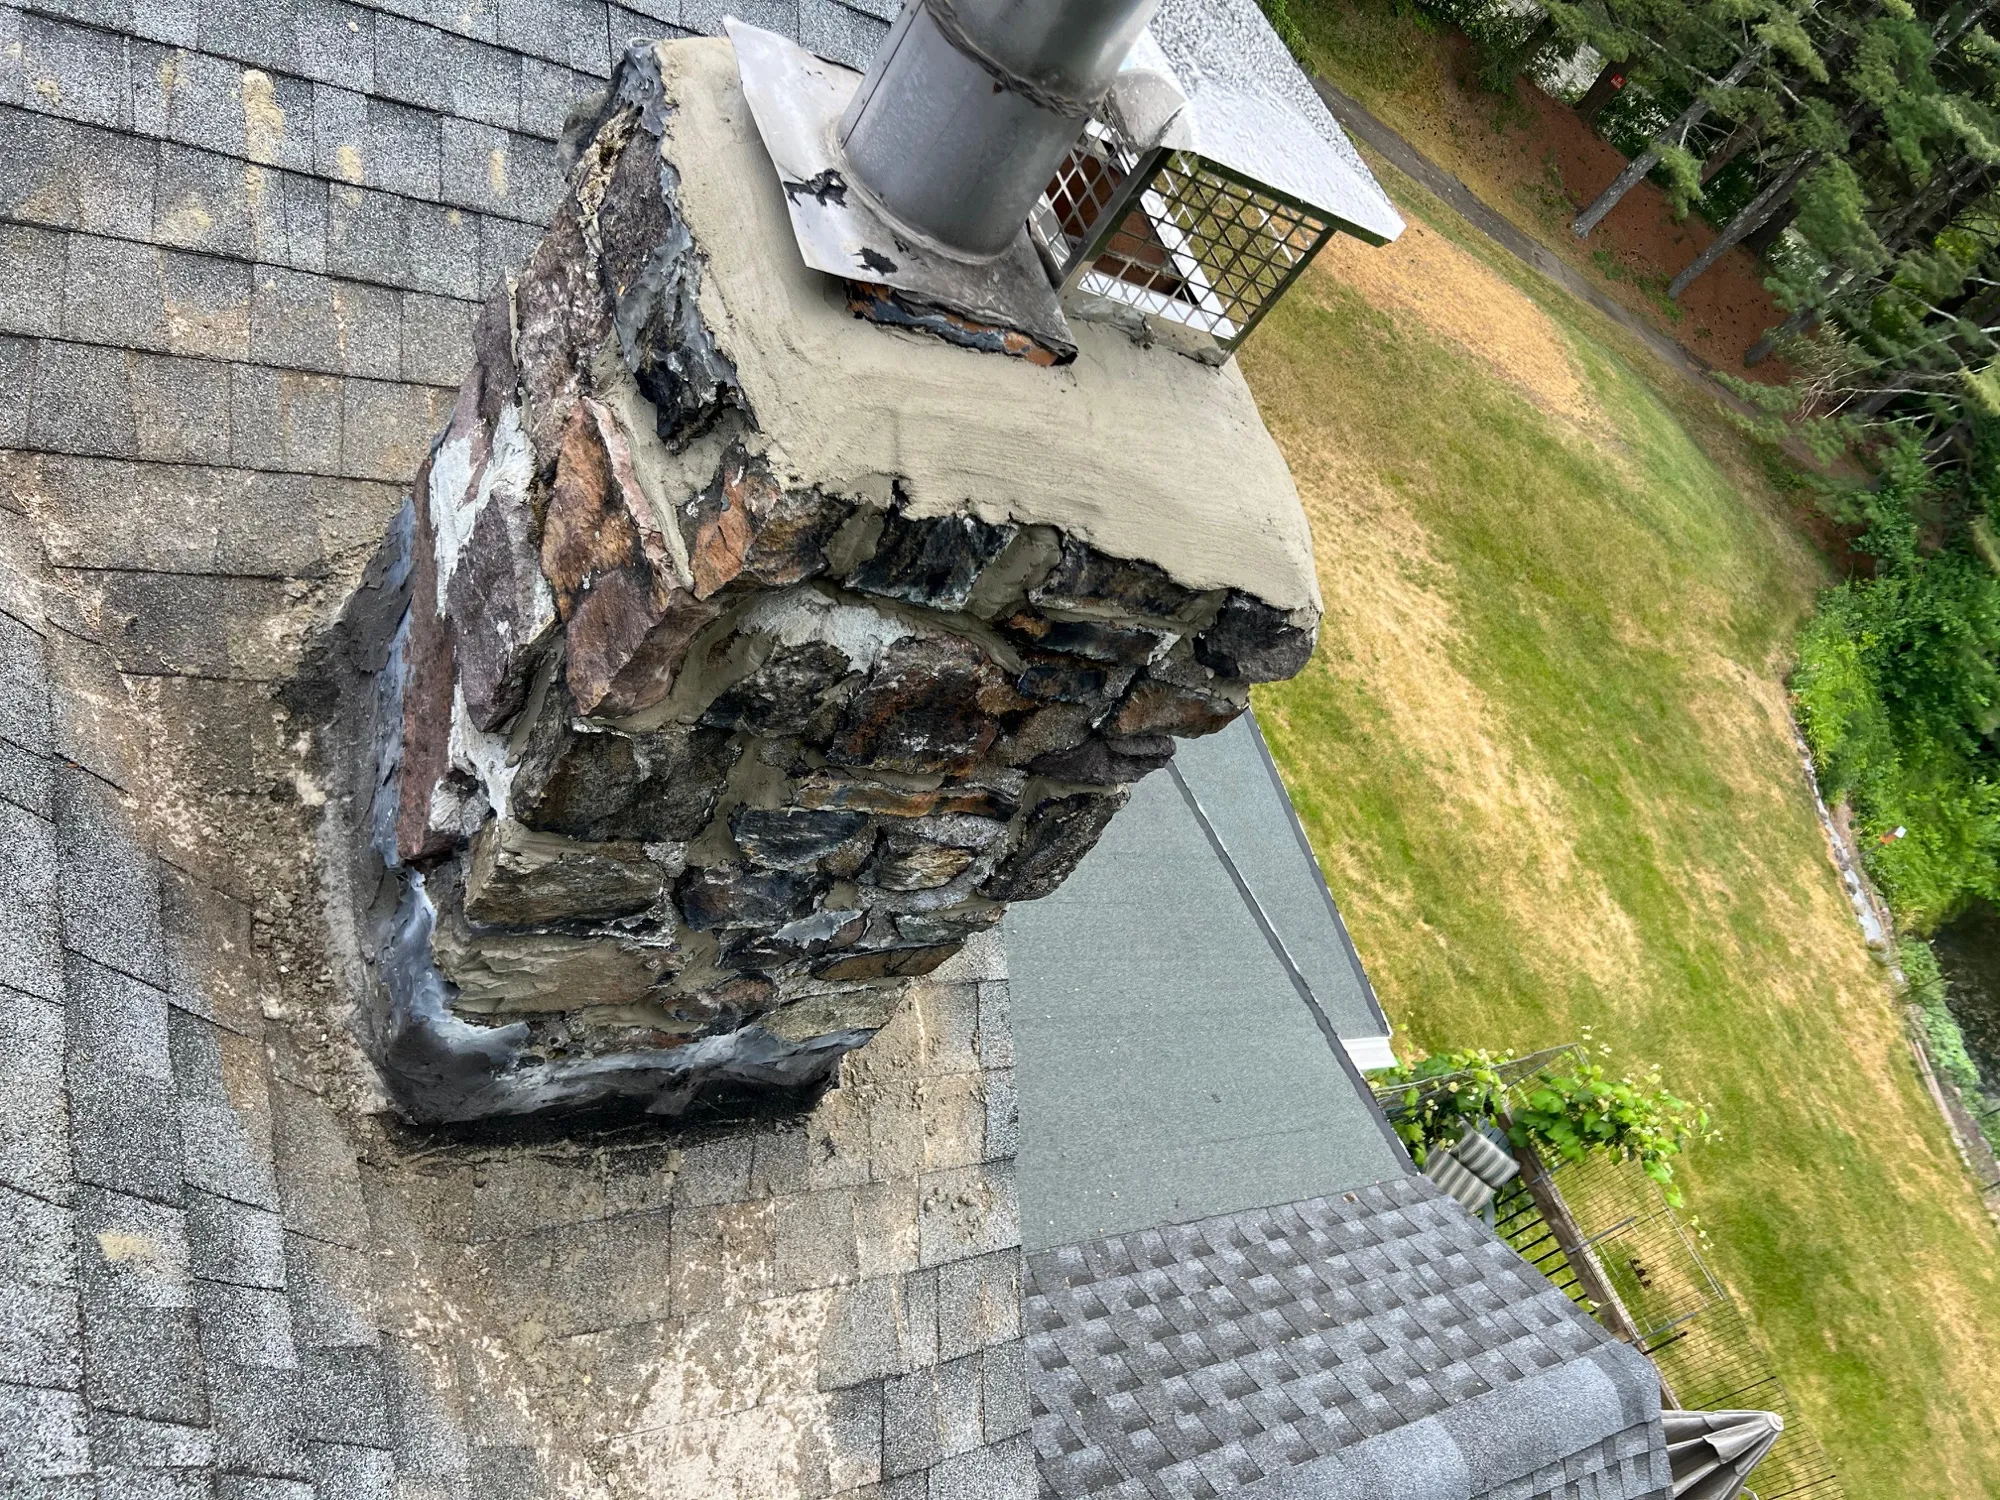
2. Cracked or missing crown
The chimney crown is the concrete cap at the very top of the chimney. It’s slightly sloped to shed water and is the first line of defense against rain entering the brickwork from above.
Crowns crack. It’s almost inevitable — concrete contracts and expands with temperature, and after enough freeze-thaw cycles, hairline cracks turn into open fissures. Water pours straight through them and into the chimney structure.
Fix: A skilled mason can sometimes patch a crown, but more often the right solution is to remove the failed crown and pour a new one with proper drip edges and overhang.
3. Missing or damaged cap
The chimney cap sits on top of the flue opening and keeps rain, snow, leaves, and animals out of the flue itself. Caps are inexpensive — usually under a few hundred dollars installed — but they prevent thousands of dollars of damage.
If your chimney has no cap, or the cap is rusted out, water is going straight down the flue and pooling in the firebox or smoke chamber.
Fix: Install a new stainless steel cap. Don’t use galvanized — it rusts within a few years in our climate.
4. Spalling or cracked bricks
Bricks aren’t waterproof. They absorb a small amount of water during rain and release it as the weather dries out. That’s normal. But once a brick gets damaged — by freeze-thaw cycles, settling, or impact — water gets trapped inside and the freeze-expand cycle starts breaking the brick apart from within. This is called spalling.
Once spalling starts, it accelerates. Each freeze does more damage. Mortar joints crumble. And meanwhile, water is pouring through the now-porous chimney.
Fix: Targeted brick replacement, repointing of mortar joints, and a breathable masonry sealer to slow future damage. In severe cases, partial or full chimney rebuilds.
5. Failed waterproofing
Brick chimneys should be sealed with a breathable, water-repellent masonry sealer every 5-10 years. Most homeowners never do this — and most builders don’t apply it from the start.
Without sealant, the brick absorbs more water than it should, accelerating freeze-thaw damage and increasing the chance of leaks during heavy rain.
Fix: A professional application of a high-quality siloxane or silane masonry sealer. This is one of the cheapest preventative steps you can take.
How to figure out which one is your problem
The honest answer: most of the time, you can’t, from the ground. The only reliable way to diagnose a chimney leak is to get up there with a trained eye and look at all five potential failure points. That’s what a free inspection is for.
When we inspect a leaking chimney, we take photos of every potential issue and walk you through what we found. If the problem is just a missing cap, we tell you that. If it’s a full rebuild, we tell you that too — and we don’t push you toward the more expensive option just because we can.
The danger of waiting
The thing about chimney leaks is they don’t stop. Every rain, more water gets in. The water rots the surrounding decking, ruins your insulation, stains your ceilings, and eventually drips into your living space. By the time it’s visible inside the house, the damage is significant.
Catching a chimney issue early — even if it’s just a $300 cap or some repointing — almost always saves thousands compared to waiting until the structural and interior damage is done.